


Microsoft Places
10 Tips for Setting up a Microsoft Places Pilot


Now that Places licencing has changed for the better (in that you no longer need to buy a Teams Premium licence), we predict that many enterprises will start ‘kicking the wheels’ of Places.
A great way to do this with any solution, of course, is to carry out a pilot (aka a Proof of Concept).
This article runs through our 10 top tips for preparing for a Places Pilot (and getting the most out of it).
TL;DR?
As of 1st April 2026, Microsoft Places became much more affordable.
Now’s a great time to explore what a pilot could look like in your organisation.
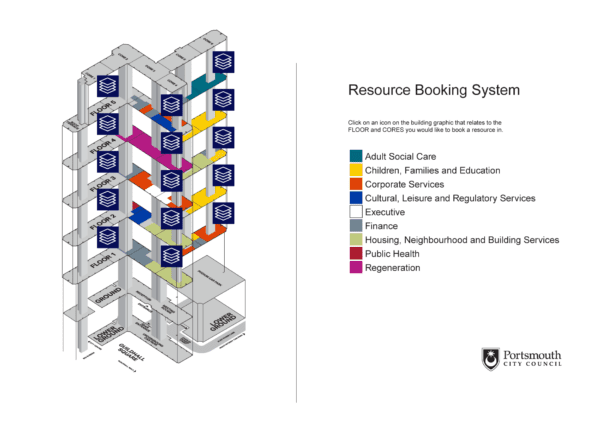
1. Get Your Meeting Room Resources in Shape
If you’re already using Room Finder, you’ve got a strong starting point for getting your meeting rooms sorted, as you can use existing room lists to jump start the configuration process.
For example, Microsoft provides a tool called Initialize-Places, which looks at your existing room mailboxes, room lists and location metadata to establish an initial Places structure.
Bear in mind, however, that Places depends far more than Room Finder does on having clean and consistent room metadata – such as building, floor, capacity, and features.
Expect to do a review of your existing meeting room resources in order for Places to work as expected. We can help you with this.
TIP: Start with a subset of well-maintained rooms rather than trying to fix everything at once.
See what you need to set up to ‘Go Places’
2. Think About How You’ll Handle Desk Bookings
If you’re currently using Room Finder to book meeting rooms (or if your existing third-party workspace booking system uses meeting room resource mailboxes ‘behind the scenes’), the same meeting rooms can be booked in Places without risk of double bookings. This means your existing users and your Pilot users can happily co-exist.
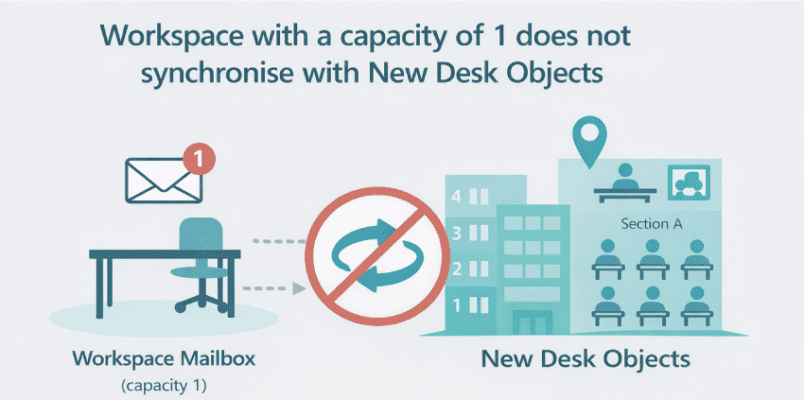
However, if you’re already using Room Finder to book individual desks, you’re likely using workspace mailboxes with a capacity of 1 (as this was the the primary way to achieve this using Room Finder).
This ‘Workspace with a capacity of 1’ approach will still work in Places, but one thing to note is that Places has introduced a new model for desk booking, where desks are defined as dedicated objects.
Desk objects have richer properties that includes the geo-cordinates of the desk and the ‘mode’ of the desk (whether it’s a drop in desk that doesn’t need to be booked, can be reserved in advance using Places, is assigned to someone, or is out of action).
For that reason, Desk Objects are a good route to take with Places, but an important thing to note is that the new Desk objects do not integrate or synchronise with existing workspace mailboxes.
This creates a challenge for your pilot if your selected users will be booking desks in the same office space as colleagues still using Room Finder and Workspace=1 to book desks.
TIP: If the above scenario applies to you, you have two – possibly three – clear options for your Pilot:
- Continue using workspace mailboxes (simpler, lower risk, but you may wish to switch your desks to using desk object when you decide to rollout wider)
- Transition to desk objects for a set of desks that are out of scope from Room Finder, but make sense for your pilot users to work with.
- Run your pilot with a group people moving into a new office space.
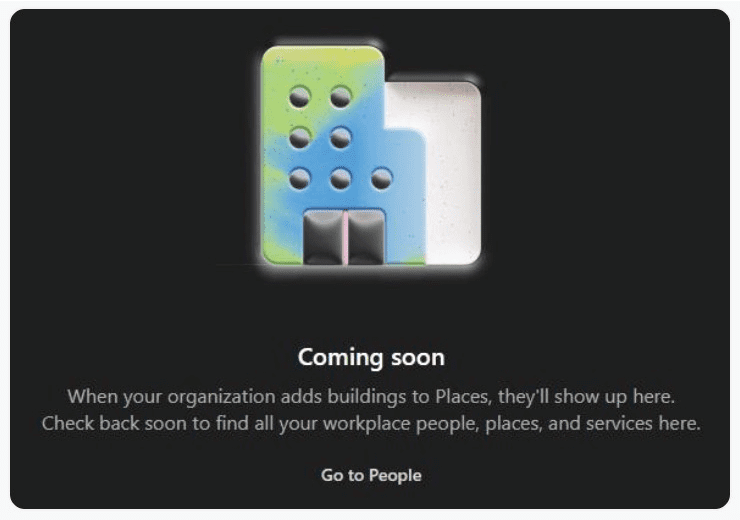
3. Restrict Access to Your Places Pilot
DON’T PANIC: Even though the licence to use Places is now included in your ‘standards’ enterprise licence, don’t panic – it won’t automatically switch on – you can control who can access it.
To restrict access to a pilot group, you should follow Microsoft’s guidance on limiting feature availability: https://learn.microsoft.com/en-us/microsoft-365/places/powershell/set-placessettings#limit-feature-access
TIP: If your Places experience shows messages like “When your organization adds buildings to Places, they’ll show up here…” for users outside your pilot group, it’s a sign that access hasn’t been scoped correctly.
Follow the instructions in the above-referenced article and ensure you’re running the latest version of the Places PowerShell client.
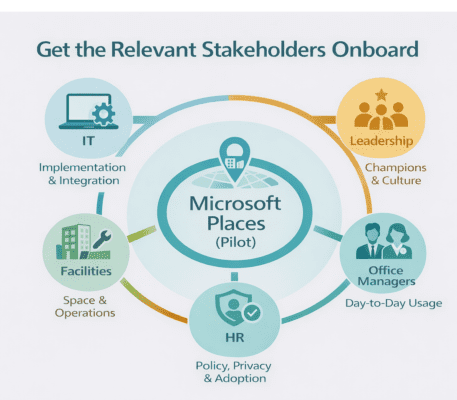
4. Get the Relevant Stakeholders Onboard
Setting up Microsoft Places involves a lot of IT involvement and heavy-lifting, but if you treat it like an IT-only exercise, your pilot and any subsequent rollout will suffer as a result.
There are other key stakeholders you should include in your pilot and of course, to ensure ongoing success post implementation, assuming all goes well. These roles are:
Facilities and Office Managers – These are the folk who understand where the real-world office management issues are. We recommend you involve them in the following areas:
Defining workspace resources: All the workspaces that are to be bookable or allocated need to be pre-defined, along with the capacity and facilities they offer. Allowing FM to directly manage workspace creation and maintenance is very much an IT‑admin driven activity, with things like delegated roles, simple controls to remove spaces from service, and a user‑friendly operational dashboard for FMs on the ‘wish list’.
TIP: Organise for your FM team to maintain workspace resources and their attributes in a spreadsheet that can be used to drive workspace creation and updates using PowerShell.
Floor plan creation & management: Allowing users to select workspaces from interactive floor plans is a core part of Places and it’s an area where FM should be closely involved – particularly as they’re most likely to hold the most up-to-date plans for your offices.
However, the conversion of floor plans into Places IMDF maps can be technically challenging, as can their upkeep in the event of changes.
For example, a desk re-numbering or room re-naming exercise may involve making changes to IMDF as well as updating resources in Places, not to mention choreographing the roll-out of changes so they occur in a timely and seamless fashion for your workforce and don’t confuse any existing bookings.
TIP: Consider how you’ll handle floor plans carefully, as neither your FM team nor your IT team may want to become experts in floor plan creation and conversion to IMDF.
Reporting: It goes without saying that your FMs will be keen to get useful reporting from Places on office occupancy, unused workspaces, etc. At present reporting in Places is relatively high‑level, with stronger support for rooms than desks. Also bear in mind that getting real results will depend on check-in mechanism, including ‘peripheral check-in’ (see point 7).
Leadership roles – By this I mean getting the ‘movers and shakers’ who will champion Places and actively use the platform during the pilot onboard. When senior managers are seen booking desks, using maps, and supporting the initiative, it sends a strong signal that this isn’t just another IT tool.
HR – Bear in mind that Places is not just about providing workspace booking, it’s about encouraging better in-person collaboration when in the office. This means you might need to get HR involved in addressing concerns around employee visibility and privacy.
A Note on Privacy – While Places enables individuals to share their location (for example, helping co-workers to find and book desks nearby), people need to be assured that it does not give managers visibility of who’s booked what or whether someone has checked into the office.
Positioning Places as a collaboration and ‘workspace experience’ tool – not a tracking mechanism – is key to building trust and encouraging adoption – see also points below about training (5) and your comms strategy (10), especially when it comes to setting up ‘weekly whereabouts’.
Without involving key people, pilots tend to become technical tests rather than a good indicator of how Places will perform at scale and meet the needs of the people that use and ‘run’ your physical office spaces.
5. Get Training Resources Lined Up
To be honest, we’d be misleading you if we said using Places was totally intuitive.
Although it’s ‘baked into’ your workforce’s daily scheduling tools (Outlook and Teams) and has a similar vibe to ‘Room Finder’, making sure you have some decent training materials in place as part of your pilot is essential.
At a minimum, you’ll want some short how-to videos and simple guidance on key tasks to get going with, the most important one of which is: How to configure your office presence.
Getting individuals to say what their working week looks like in terms of their planned days in and out of the office is a fundamental cornerstone of getting the full benefit from Places – that is, not just workspace booking, but helping people come together at the optimal time, and in the right place.
TIP: One of the most effective approaches is to create a SharePoint-based help page and link to it directly from the Places home experience.
6. Get a Floor Plan or Two Created
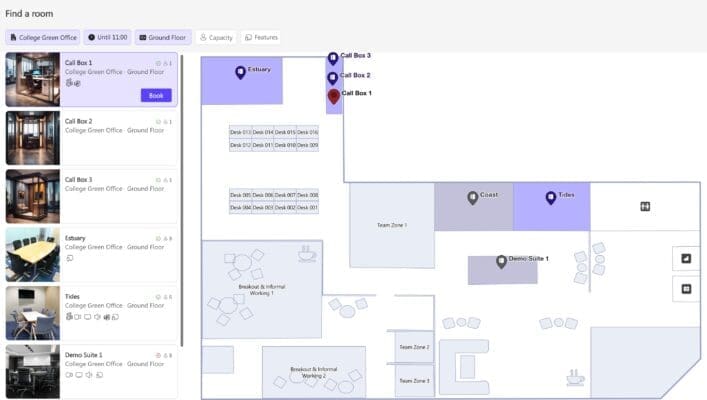
As we said earlier, Places ‘comes into its own’ when you can select the workspace you want to book from an interactive floor plan.
In fact, all of the third party room and desk booking systems we’ve worked with over the years have offered this facility. It goes without saying, that if you are seeking to replace an existing third party booking system with Places, you’ll 100% want to offer this same feature.
So, for your Places pilot – get a nice floor plan created. If you have an existing workspace booking system, you might want to emulate the design of your existing floor plan in your Places map. This can be challenging owing to that fact that IMDF is, by design, more about geometry and resource meta-data than pretty pictures.
So don’t expect full-colour, detailed maps in Places. We recently worked with a client migrating from a full-colour map in their Zoom workspace booking system into Places. The goal was to get as close as possible to the existing experience, which we feel we achieved, but some compromise was inevitable.
TIP: Work with the floor plan early. It takes longer to configure than most organisations expect, and it is central to the user experience.
7. Consider Setting up Peripheral Check-in
As we said earlier – tracking how your office spaces are actually being used will be a key area your facilities teams and business owners will want to report on.
Whilst you could (in theory) track the number of bookings made for a particular office each day, you’ll struggle to track this metric with any degree of accuracy without a reliable check-in mechanism.
Bear in mind, there’s always people that will book desks and rooms but not show up on the day. Additionally, folk might want to walk up and use a workspace without booking in advance. The result is wasted space and unreliable utilisation data.
One way to detect with any certainty that someone has arrived at a desk is peripheral check-in.
Peripheral check-in can require a fair amount of upfront effort to set up – in most cases, you’ll need to physically visit each docking station or screen to configure and capture the necessary data.
However, if accurate occupancy tracking is important to you, it’s well worth including peripheral check-in as part of your pilot. It gives you a clear view of how peripheral check-ins work and will help you decide whether it justifies a broader rollout ‘post-pilot’.
An added benefit of the peripheral check-on is the ability to automatically release desks in the event of a no-show, making them available for ‘on-the-day’ use. Through experience, auto-release can significantly improve office utilisation, as long as it’s easy to assess the free/busy status of a workspace.
There are other ways to detect actual occupancy – for example – using sensors that work with Places. Check out our comparison of sensor types for more information.
8. Will You Need to Plug Some Gaps?
If you’re in the situation where you’re replacing an existing third-party booking system, there may be some things that aren’t offered (albeit currently) in Places.
Off the top of my head this includes:
- Car park booking
- Catering booking
- Visitor management
- Comprehensive booking management for FMs and Office Managers (e.g. to switch bookings round)
If you think any of these will be ‘deal breakers’ in a pilot (or indeed, for a full implementation) then you’ll need to work out ways to plug the gaps.
We recently chatted with a client that had created their own catering booking service using PowerApps. If you have the time and energy to go down this route, that’s great. Otherwise you may wish to check our solution providers that have complementary ‘off the shelf’ solutions that address these areas.

9. Decide What Your Success Factors Will Be
Before you begin, be clear on what you’re actually trying to achieve.
- Are you looking to improve utilisation of your office space?
- Do you want to encourage better in-person collaboration?
- Do you want metrics that will show how your office portfolio is performing and where you might be able to save costs?
- On the same subject of cost saving – especially now that the Microsoft Places licence is included in your base Microsoft 365 licence – do you want to see if you can save costs by replacing a third-party workspace booking systems with Places?
Whatever it is, define it upfront – and agree how you’ll measure it.
Without having that clarity, your pilot risks becoming a technical exercise rather than something that helps you make a confident, business-led decision about rolling Places out more widely.
10. Have a Places Pilot Communications Strategy
Even with a pilot, make sure everyone knows what’s coming down the track and what you expect them to get out of the pilot.
As we said in point 5 – you’ll need training resources, but make sure folk know where to start (e.g., by setting up there weekly plan), know who to call if they have any issues, and so on.
It’s also important to set some context. Be clear on what Places is – and just as importantly, what it isn’t – especially if you have an existing booking system.
If you’re been using Room Finder to date, explain the differences with Places Finder, and what you want people to do differently.
For example, a small detail like getting people to use the filter or view dropdown at the top of their Outlook calendar to ensure ‘Desks’ is selected. Left unchecked, any desk bookings won’t appear in their calendar view.