


SharePoint Management
10 Essential Security Best Practices for Your SharePoint Online Environment in 2025


SharePoint Online is a platform that can give your IT security team the jitters.
It’s is highly flexible, often all employees use it, and external access is also possible. Often sensitive documents are posted and practices around permissions management can be somewhere between sleepy and non-existent. Site management is frequently decentralised so IT teams are reliant on individuals to shore up local security efforts. And site sprawl is common, making it harder to effectively manage each site.
More IT departments are striving to take a security-first approach to everything they do.
According to the latest global survey from CIO, nearly two thirds (65%) of CIOs expect to be spending more time on tackling cybersecurity, while over a third (34%) are increasing security-related recruitment.
Thankfully, Microsoft has invested in tools that give IT teams a robust yet flexible approach to security – by that I mean one that keeps data protected without turning everyday security administration into a bottleneck of approvals:
“Can you approve access to this shared folder?” – even though it’s just for the marketing team’s quarterly campaign files.“I need to add a colleague to a Teams channel — can I get sign-off?” – for something as routine as project collaboration.
“A guest can’t access the meeting materials — can you check the sharing permissions?” – turning collaboration into a support ticket.
In this article we’re going to explore 10 essential (pun absolutely intended) security best practices for 2025 that provide a robust defence of your SharePoint Online environment.
1. Enforce Multi-Factor Authentication (MFA)
MFA remains a pillar of SharePoint Online security and switching it on is highly recommended. In fact, if you haven’t got it enabled, we’ll go on and on and on about it until you do. Deal?
Microsoft has long stated that enabling MFA stops the vast majority of compromised accounts – in fact 99.9% of compromised accounts do not have MFA enabled – so in our view there’s very little argument against turning on MFA.
Yes, MFA can be a minor inconvenience, but folk are now accustomed to MFA across all their apps – not just Microsoft ones – so it’s a small price to pay.
We recommend enforcing MFA through enabling Conditional Access policies in Microsoft Entra ID, formerly Azure Active Directory. Conditional Access sets policies to be enforced after first-factor authentication (usually login/password or Windows Hello) is completed.
If you haven’t got it enabled across your organisation, turn it on first for all admins and any high-privilege accounts first. That will be a priority from a security point of view, but it also allows you to learn if there are any practical issues with MFA that need to be sorted out before rolling it out to all your users.
2. Use RBAC & Principle of Least Privilege
‘Over-permissioned’ accounts are a well-known vulnerability.
When users have more SharePoint admin rights than they need, they can unintentionally enable settings or grant access that exposes sensitive information. And if those over-permissioned accounts are compromised, attackers gain a fast track to your environment, potentially with ‘the keys’ to far more than they should ever have access to. Cue cyberattacks.
The best approach is to strictly limit SharePoint privileges to only those who need them. In this way, you’re simply reducing risk in a way that does not impact your user base. This aligns with an administrative policy of ‘Principle of Least Privilege (POLP)’.
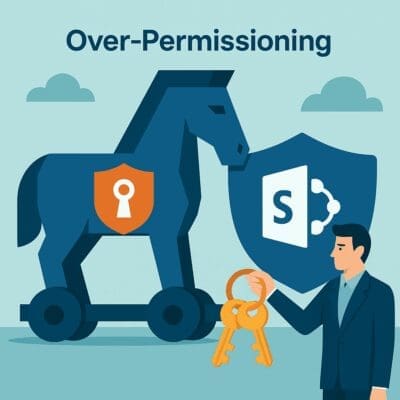
The best way to enable and then manage POLP is to use Role-Based Access Controls (RBAC) to define any Microsoft 365 admin roles and related SharePoint permission levels, and then keep these under strict control. We then suggest you regularly review and when necessary, right-size your permissions so you’re sticking to your plan.
Basically, we’re saying enable POLP through RBAC to avoid an OMG moment, OK?
PRO-TIP:
Avoid using the group ‘Everyone except external users’ on sensitive SharePoint sites. It can unintentionally expose confidential content by making it widely accessible – and easily surfaced through search or Copilot.
Indeed, Microsoft removes this group from Private Group Websites.
Instead, use specific security groups to control access. It’s a safer, more manageable way to ensure only the right staff can see sensitive information.
3. Secure Admin Accounts
As part of your approach to the Principle of Least Privilege (POLP), it’s critical to secure all SharePoint admin accounts. A compromised admin account can be extremely serious, potentially opening the door to your entire Microsoft 365 tenant.
Here’s how to reduce that risk:
- Ensure there’s a clear separation between admin and user accounts. Consider carefully who should have admin access and restrict these to the minimum without disrupting operations and basic processes.
- Set up MFA for your admin accounts as soon as possible (see point 1 above).
- Consider restricting portal access to trusted locations only, providing another layer of security.
- Use just-in-time (JIT) access for higher-level admin roles to limit exposure. While JIT is often easier to implement for global or tenant-level roles, look for ways to make it workable for SharePoint admins who need frequent elevated access.
Learn more about Microsoft’s role-based access control best practices →
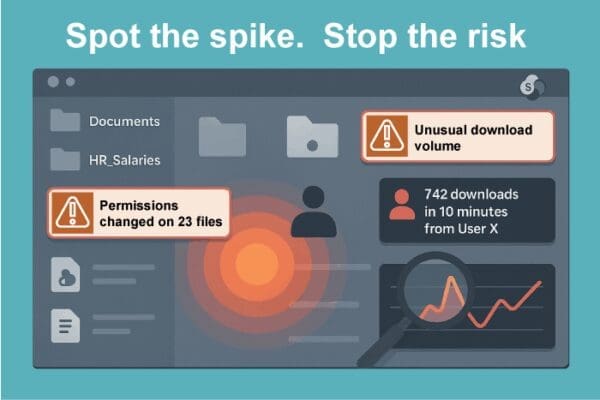
4. Audit and Monitor User Activity
Irregular patterns, sudden changes and anomalies around user activity are usually explainable, but keeping an eye out for suspicious activity can spot a serious issue before it escalates or prevents an issue that in turn leads to a vulnerability.
For example, some things you might want to look out for could be:
- A spike in download activity from a site or across sites from a particular user.
- A high number of permission changes across one site.
- External sharing configured on a site where it is not expected.
Using a combination of Microsoft 365 Purview Audit logs and PowerShell, you can take a series of steps to spot security issues and set alerts to ensure that nothing fishy is going on.
- Enable & confirm auditing → Make sure Unified Audit Log is on so all activity is captured.
- Search in Purview → Build and run saved searches for risky patterns (e.g., external sharing, mass downloads/deletes, role changes, label removals).
- Set alerts → Configure alerts so IT gets notified automatically when thresholds are crossed.
- Use PowerShell reports → Schedule recurring
Search-UnifiedAuditLogqueries to export events and flag anomalies. - Act on findings → Investigate alerts and automate fixes (revoke risky links, re-certify owners, remediate any departures from your policies).
To be honest, this is a lot of steps to detect anomalies, and even when you do detect something, the fix is not automatic: you have to roll your sleeves up and take remedial action.
Skip the PowerShell. Skip the portal-hopping. See how you can turn Purview & log data into automated detection and fixes.
5. Configure External Sharing Policies
One of the most risky aspects of SharePoint is oversharing data and documents with external parties.
This can be a leading cause of data exposure and can easily happen by mistake in SharePoint. For example, a person might share the wrong document or upload a file to a space where they are not aware that external sharing has been enabled.
Use Microsoft 365 sharing controls to limit the risk of external over-sharing by:
- Not allowing anonymous links for external sharing. By doing this you’ll force external users to either sign in with their account or enter a one-time verification code.
- Setting expiration dates on links sent out. This will help prevent sharing that might be forgotten about and later accessed by a compromised external account, for example.
- Using whitelisted domains. Most external parties accessing documents on SharePoint are likely to be from a set organisations you can nail down – so be like a bouncer and put them in your whitelist (here’s how)
- Ensuring there is an approval process to enable external sharing – even if it is slightly inconvenient – to limit risks.

6. Regularly Review Guest Access
If you do enable external access, then it’s important to keep it under control.
One of the key challenges of creating guest accounts is that it is hard to keep track of which are still being legitimately used, and which are dormant, mainly because third parties may not tell you if a person has moved on. Some guest accounts also end up never getting used.
Dormant guest accounts can represent a risk as they may still be ‘live’ for people who should no longer should have access (for example, where they’ve left the company), or where they just get left for a long time, increasing the chance of them being compromised.
Always regularly review guest access. You can do this by periodically scheduling Entra ID access reviews – there are various tools that can help, and of course, that includes Microsoft partners like us.
It’s also worth checking in with the companies you ‘share with’ to ensure that there have been no changes in personnel.
We have a ready-made solution that will keep you on top of guest access and the many other security ‘gotchas’ I’m talking about in this article, which is free to trial for a month. Click on the link to the right to find out more>
See unwanted Guests in real time, take action immediately.
Also, if you do use a lot of guest accounts, a ‘data room’ approach can help manage your guest accounts and give you more control over your external sharing.
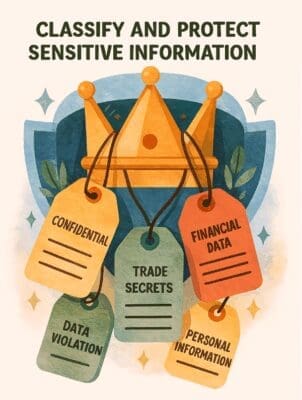
7. Classify and Protect Sensitive Information
Identifying which information is particularly sensitive or confidential and making that clear can go a long way to preventing accidental leaks, as well as ensuring data privacy compliance.
If you had a file that was marked ‘Massively confidential, highly secretive, do not share with anybody!,’ then (hopefully) people would think twice about adding it to a SharePoint site called ‘Don’t put anything remotely private here!‘
Of course, nobody is going to rename all SharePoint sites or files in such a daft way but making this clear matters.
That’s where sensitivity labels can help.
Using Microsoft Purview (included with Microsoft 365 E3 and E5 plans), you can apply sensitivity labels to individual documents, entire libraries, and even full SharePoint sites. These labels help users instantly recognise the level of confidentiality – and more importantly, they enforce rules behind the scenes.
For example, a document marked Confidential might:
- Block external sharing
- Require encryption
- Warn users before it’s downloaded or emailed
- Trigger Data Loss Prevention (DLP) policies when uploaded to the wrong place
When your users also have awareness of the different levels of information security you have, and you back that up with clear communication and training (see also our last point), it keeps security and compliance top of mind. Even simple reminders in onboarding, quick guides, or just-in-time prompts within SharePoint can make a big difference.
Applying sensitivity labels to different sites also means you can align Data Loss Prevention (DLP) policies to each SharePoint site – for example to block or warn about risky file sharing. You can also align policies on access and permissions.
PS if you’re on E5 or have Purview Information Protection add-ons, you can go even further, and:
- Automatically apply labels based on content (e.g. keywords, patterns, sensitive info)
- Align DLP rules on a per site or per library basis
- Apply labels by way of setting policy, rather than relying on users to choose correctly.
8. Implement Versioning and Retention Policies
Any approach to DLP relating to your SharePoint environment should also incorporate versioning and retention policies.
Well spotted: These are not security measures per se, but they are important for protecting against accidental deletion as well as malicious data deletion. Implementing versioning and retention policies can help to minimise the damage and disruption caused by a breach.
Ensure that you tick a number of data retention boxes, including:
- Enabling you have document library versioning across your SharePoint sites.
- Ensuring there are retention policies in place for your critical data.
- Making sure that data retention is aligned with your compliance requirements – in fact this always has to be the starting point.
9. Automate site provisioning with governance controls
There’s a reason that we go on about automated SharePoint site provisioning so much – and it’s not just because we’re process-obsessed technologists.
Controlling site provisioning is not only an excellent way to prevent SharePoint sprawl, it also ensures that every new site is secure from the outset with the right settings, access controls, and a consistent template.
Done correctly, SharePoint provisioning controls can add approval workflows, enforce naming conventions, enable lifecycle policies at creation, and provide tailored templates for different site uses – all of which drive a more consistent approach to security, reduce risk, and cut down on abandoned sites that aren’t optimised for security.

Automatic site provisioning can be set up using tools like AvePoint Cloud Governance and ProvisionPoint (we work with both of these, so give us a shout if you’d like to find out more).
Also Microsoft is helping out here with a new set of Governance Reports from SharePoint: https://learn.microsoft.com/en-us/sharepoint/data-access-governance-reports.
10. Keep Up with Microsoft 365 Security Updates
Security is an ongoing and constantly evolving battle. Throwing AI into the mix has added a layer of complexity and arguably opportunity for cybercriminals.
Microsoft has invested significantly in security and is certainly one of the reasons why many IT departments choose to invest in the Microsoft stack.
The side-effect of this is that security features and security patches being added all the time, and it’s critical to remain up-to-date with these as lagging behind means you can be exposed, particularly to a newly discovered vulnerability. Always ensure that you subscribe to Microsoft 365 message centre updates. An additional quarterly review process for reviewing any new security settings can also be a good way to ensure nothing important has been missed.
And there’s more…
Above and beyond all these steps, robust security is also supported by training and awareness for your IT professionals to keep on top of a fast moving-area.
For example, if you have a Microsoft 365 E5 licence or Microsoft Defender, your IT team might be keen to deliver security training that includes a cyber attack simulation.
Successful cybersecurity programmes also incorporate user awareness and support, so it’s essential to build user engagement and training into your overall SharePoint security strategy – especially security training that’s tailored to your organisation’s specific needs and risks, and tracked to make sure everyone’s read and understood your training. Read more about delivering training in SharePoint & Teams>
Planning more SharePoint security measures?
Discover how you can roll them out faster, with less effort, so you can focus on what matters most.