Desk booking
How to configure Microsoft Bookings as a Desk or Room Booking System for external users
Microsoft Bookings is a user-friendly tool that enables external audiences to explore and book available meeting slots or services you provide.
While its primary focus is on booking people’s time and services, we wanted to explore whether it can be adapted to allow external users to book other resources you might want to offer (and monetise), such as unused office space.
This article takes you through the steps you need to carry out to create a desk or room booking system for external ‘guests’ using Microsoft Bookings.
TL;DR?
This IS a long article intended for a technical audience.
In brief, whilst you can create a very simple desk booking system using Microsoft Bookings, but you may need more functionality than Bookings provides.
Bookings not quite the ticket? Discover other workspace booking options Desk and Room Booking systems for Microsoft 365
These are the steps to configure Microsoft Bookings as a desk booking system for external users
How to configure Microsoft Bookings to allow external desk bookings
A bit of background before we start: As we’re going to be booking workspace services instead of people’s services, we need to configure Microsoft Bookings to work with Microsoft resource mailboxes instead of people’s mailboxes.
A resource mailbox is a type of mailbox that represents an inanimate resource, such as a meeting room, piece of equipment, or a desk.
As with ‘human mailboxes’, each resource mailbox has a calendar associated with it, however to ‘work its magic’, Microsoft Bookings uses the power of shared calendars. Shared calendars let you consolidate the availability of multiple participants (in this case, desk availability) into one view.
So here’s a step-by-step guide:
1. Create some test resource mailboxes
If you’re already using Microsoft resource mailboxes for internal meeting room and workspace bookings, it can be beneficial to use the same resources for both internal and external use.
By doing so, you can prevent double bookings and ensure that Microsoft Bookings only displays available resources that haven’t been booked by your own workforce.
To get started, however, I recommend creating some test resource mailboxes.
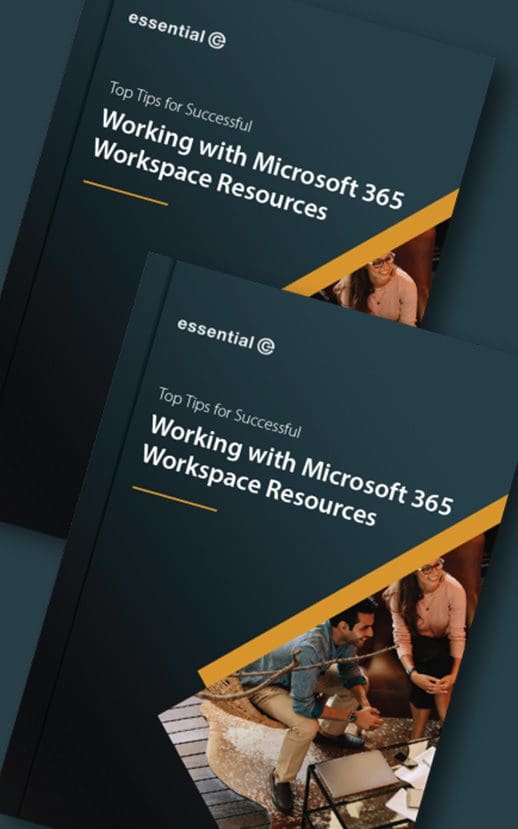
For more information on how to configure resource mailboxes, including the NEW workspace resources in Microsoft 365, check out our eBook.
2. Start up Microsoft Bookings
Open the following link in your browser: https://outlook.office.com/bookings/
This is where you can configure your own booking page and any shared booking pages.
Create a new Shared booking page
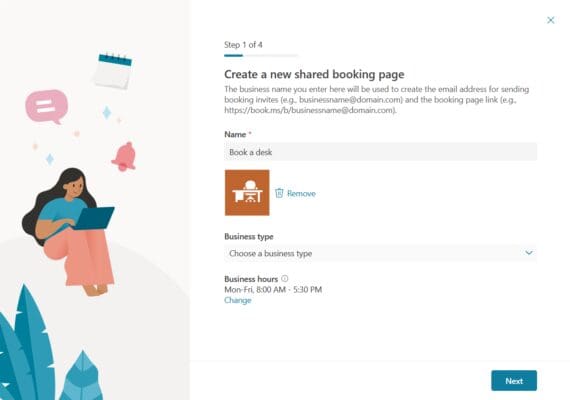
2.1 Click “Create” to add a new Shared booking page 
2.2 Specify a name for the booking page, e.g., ‘Book a desk’.
2.3 Select a logo file for your page, such as your company logo or an icon for your desk booking service.
2.4 For Business hours, set the hours when the desks will be available.
Add ‘staff’ members
2.5 On the next page, you can add the ‘staff members’ that represent the resources which will be bookable. You must add each resource by searching for its name.
Note that you can revise any of these settings later.
At this point you need to overlook the fact that the prompt says ‘Invite staff’. You are basically treating your desk resource mailboxes as though they are members of staff.
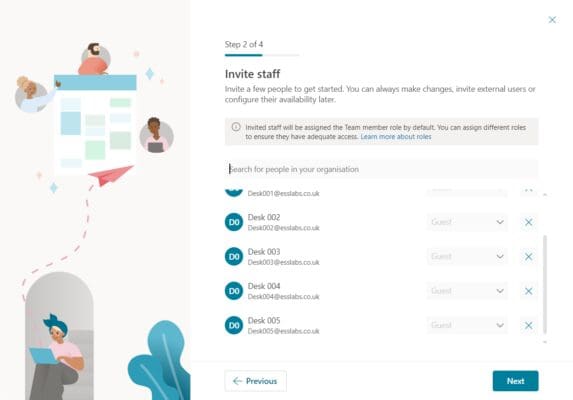
2.6 Click next to skip setting up services as we will configure these later
2.7 On the last page you can specify whether the booking page will be available to your organisation only or to anyone who has the link.
2.8 Click Create.
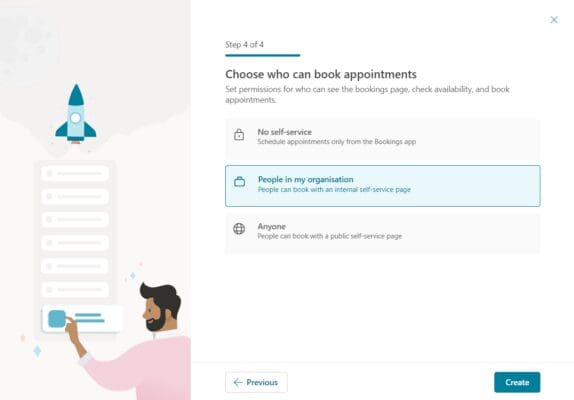
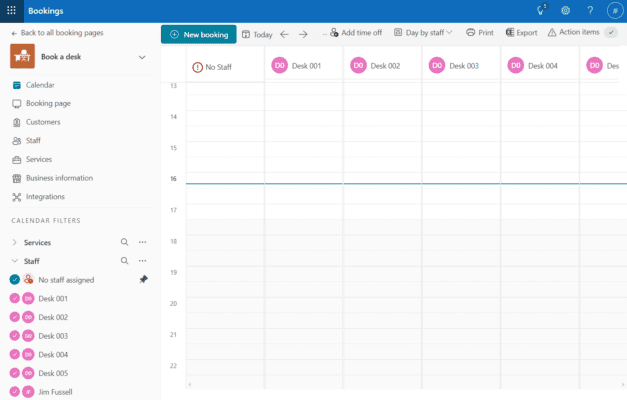
After the page is created you will be taken to the management view.
Here you can view the calendar for all the resources you’ve specified and change the configuration.
You can also amend bookings, such as changing a booking for Desk 05 to Desk 01.
3. Refine the Microsoft Bookings Settings
Customise your desks
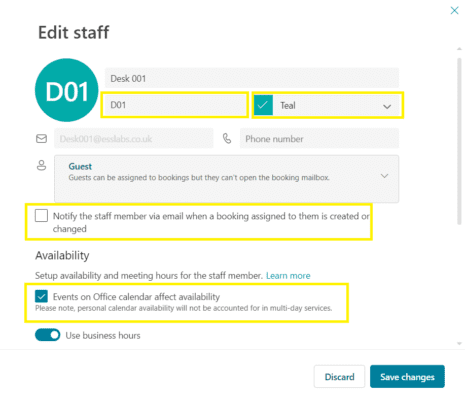
First select the “Staff” section and one at a time, set the initials and colour for each desk.
The settings we recommend are as follows
- Set initials for each desk – maximum 3 characters
- Set colour for your desks – you may want to colour code desks. E.g., you may want to set riser desks as a different colour
- Untick the option to Notify
- Tick the ‘Events on the Office calendar affect availability’. This prevents double bookings by taking into account any other bookings of the resource.
Customise your desk booking times
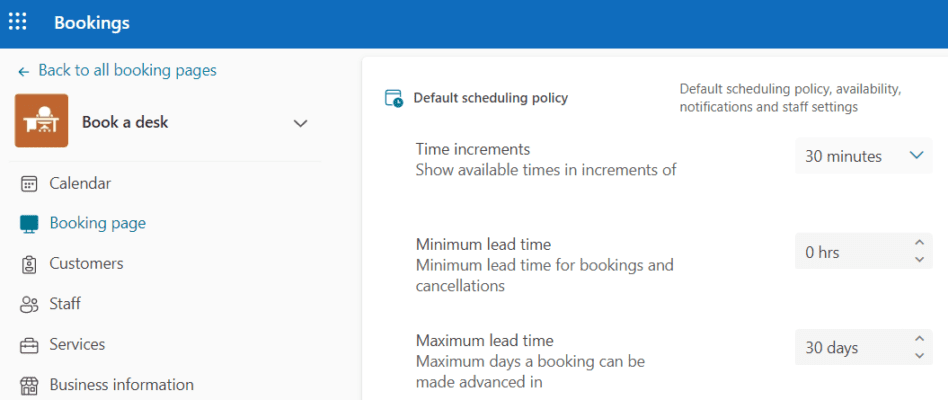
Select the Booking Page and then expand the Default scheduling policy.
Here you can set the increments available for bookings, the minimum lead time and maximum future booking period.
For desk bookings, the following options are recommended
- Disable email notifications to the business – unless someone wants to receive an email whenever a desk is booked
- Enable ‘Send a meeting invite to the customer’ – this will send a meeting request to the desk booker so that they have the booking in their calendar. The meeting also contains a link to reschedule or cancel the booking.
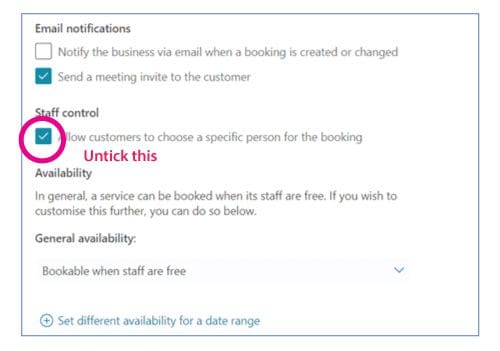
By default, a user can choose which staff member (i.e., desk) to book.
We recommend you untick the Staff Control option.
This will avoid any confusion where users of the system are prompted to ‘Select Staff’. Additionally, unticking this option will show availability across the pool of available desks (and not just the selected desk number), offering a better service to the end user.
Click Save at the top of the page.
Customise your desk booking services
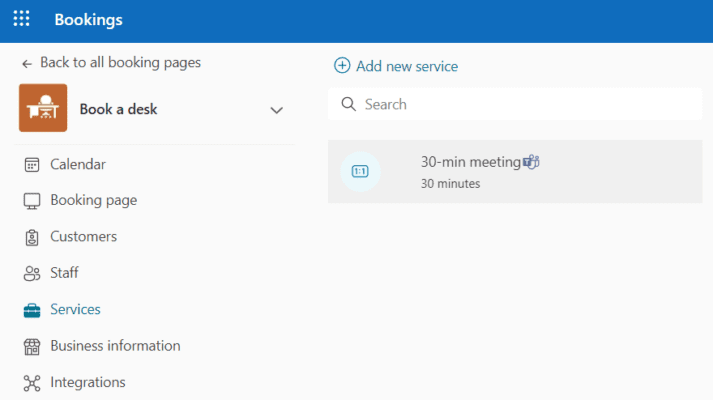
Now, select the Services section.
You can see the 30-min meeting that was created by default. This can be deleted after other services are created.
In this next stage we are going to create two services:
- A Full day desk booking, and a
- A Half day desk booking
Basic Details
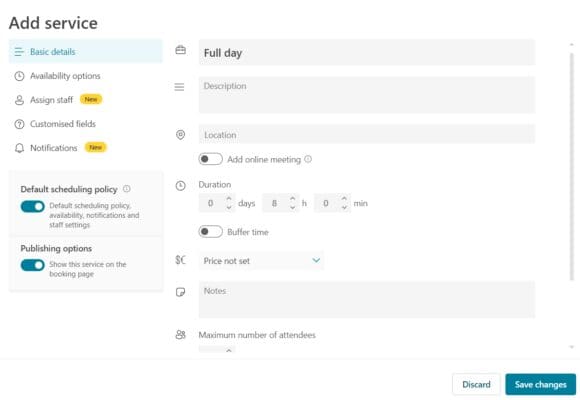
Add a new service, and then for each service:
Supply some basic details
- Specify the name of your desk booking offerings (e.g. Full day)
- Set the relevant duration (e.g. 7 hours, 30 mins)
- Setting a buffer time here will allow for a between-desk clean, which makes most sense for shorter bookings.
- Optionally specify a cost for a full day booking.
Specify your availability options
This will use the default scheduling policy set earlier, but you can customise for each service if required.
Assign ‘staff’
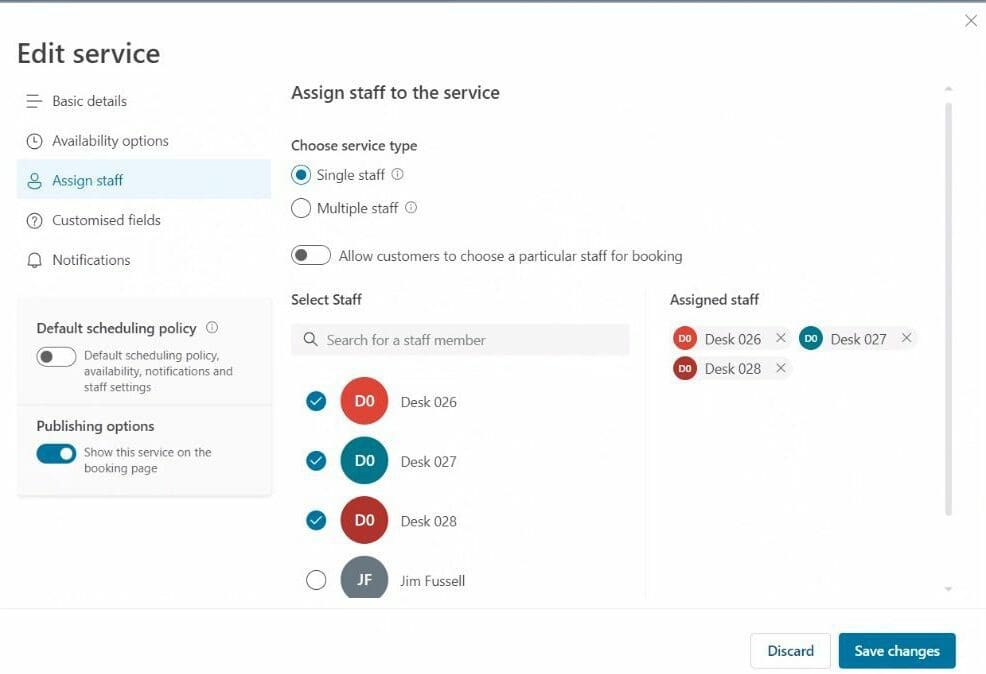
Here we will assign the desk resources you’ve created to your ‘full day booking service’:
- Your service type could potentially allow multiple desks to be selected, but we suggest you make this ‘single’ for the sake of simplicity.
- If you didn’t untick ‘Staff control’ as a default earlier, this is where you can individually control the ability to select a particular staff (desk) for booking. To re-iterate, only enable this option if you want users to be able to choose a particular desk from a list of desks. By doing so, however, they will see the confusing prompt ‘select staff’, and they will individually need to check the availability of each desk.
- Next, you can tick all the staff (desks) which are available for the service. In this case we will tick all the desks that are potentially available for full day booking.
Customised fields
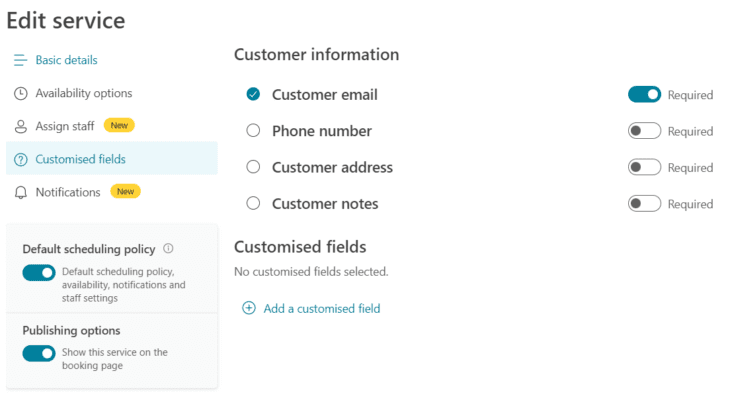
Select what the booker must enter when booking. Note that their name will always be requested.
- For an internal desk booking system this can just be email. Select to make it Required.
- If there are any custom fields that you need you can add them here.
Notifications
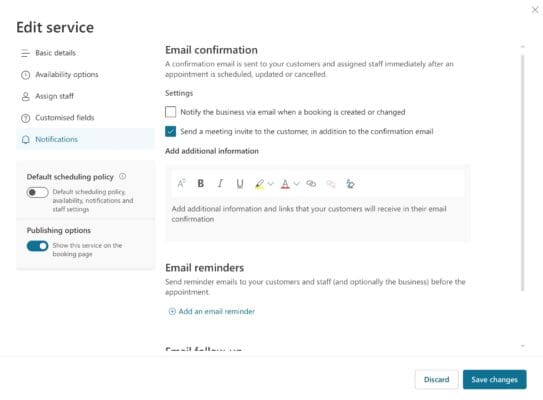
- The Default scheduling policy is used unless you choose to change it.
- You can tailor the content in the email confirmation. E.g., you might include a floor plan showing the location of their booked desk and any other information.
- You can also configure email reminders regarding their booking. A 1-day reminder is enabled by default.
- A follow up email is added by default. You can delete this unless you want a follow up to go to the user after every desk booking.
Repeat similarly for your ‘Half day’ desk booking service.
When you have created the services you need, you can delete the 30-minute service. 
4. Publish Your Desk Booking Service
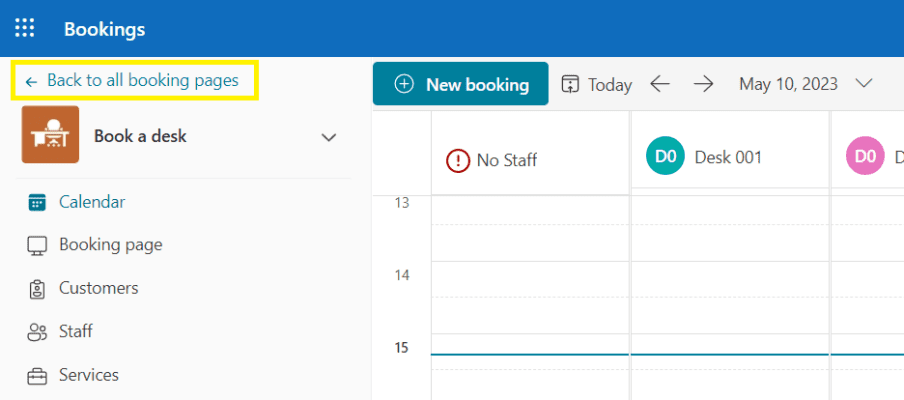
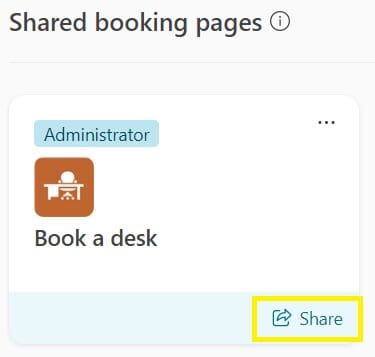

Now your system is configured, you can share the link with those that need it.
It is also possible to create a link to embed the booking page into SharePoint and/or your intranet.
- Click Back to all booking pages
- From the main page, click Share to create and copy the links
For the full back story and to see a video of what booking desks using Microsoft Bookings actually looks like to end users, check out this article: Using Microsoft Bookings to provide a desk booking system for external users.
Supercharge your Microsoft 365 room booking experience!
Unlock the full potential of your native Microsoft 365 room & workspace bookings by incorporating advanced FM services & catering & visitor management services.


